When you specify or buy a micro-perforated filter plate, the uniformity of the hole diameters directly affects filtration performance, flow distribution, particle retention, and longevity. Even small, systematic variations can cause channeling, uneven wear, or inconsistent filtration efficiency. That’s why an inspection routine that is practical, repeatable, and scaled to your production runs is vital.
This guide outlines proven, easy-to-adopt methods — from quick visual sampling on the shop floor to laboratory-grade optical and image-analysis approaches — so you can set realistic acceptance criteria and catch issues early.
Quick shop-floor checks (fast, low cost)
1. Visual inspection (first line of defense)
Use good lighting and a loupe (10×–20×) to scan for obvious problems: plugged holes, torn edges, burrs, or inconsistent shapes. Mark any suspicious areas for more precise measurement.
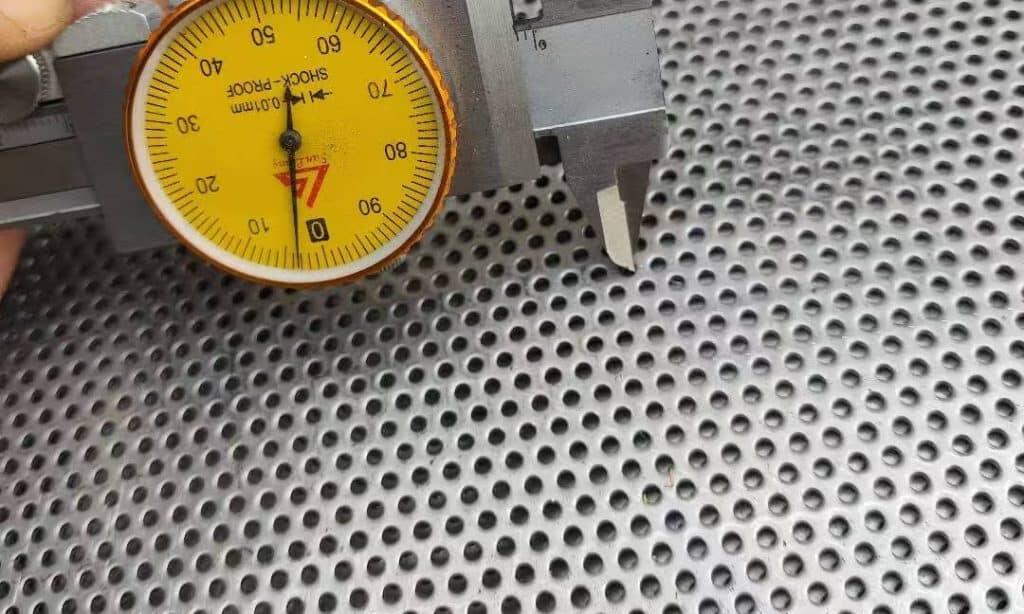
2. Random sample caliper checks
For micro-holes on plates with diameters large enough to be measured accurately, digital calipers (0.01 mm resolution) can be used on representative holes. Record several measurements across the plate (center, thirds, edges) to spot trends.
3. Pin gauges / plug gauges
When hole diameters are within the gauge range, simple pin gauges give a fast go/no-go check. They’re low cost and useful for production acceptance testing.
Precision measurement methods (recommended for micro-scale accuracy)
1. Optical microscope with calibrated imaging
An optical microscope (stereo or compound) with a calibrated camera and image-analysis software (for example ImageJ or similar) lets you measure many holes quickly. Capture a high-resolution field, set the scale, and batch-measure hole diameters — then export the distribution for statistical analysis.
2. Automated vision inspection systems
For medium to high volume production, machine vision systems (line cameras + telecentric lenses) can inspect entire sheets in seconds, measure hole diameters, roundness, centering and count defects. These systems produce pass/fail outputs and SPC charts for process control.
3. Scanning Electron Microscopy (SEM)
For sub-50 µm features or where surface topology matters (micro burrs, recast zones), SEM provides the resolution needed. Use SEM mainly for R&D, failure analysis, or initial process qualification — not for routine production checks.
4. Non-contact laser micrometry / confocal profilometry
Non-contact optical profilers measure hole profile and edge condition without disturbing the part. Useful for thin, delicate plates where contact gauges could deform features.
Functional tests that reflect real performance
1. Flow / permeability test
Measure flow rate through the plate at a fixed pressure (or measure the pressure drop at a fixed flow). Differences from expected values often indicate blocked or undersized holes and are especially useful when filtration performance is the main concern.
2. Bubble-point or capillary pressure test (for very small pores)
For very fine micro-perforations used for liquid retention or precise filtration, bubble-point testing can detect the largest effective pore and helps validate pore-size distribution in functional terms.
3. Particle retention / challenge test
Introduce a controlled particle suspension at a defined concentration and check particle passage downstream. This directly proves whether the plate meets filtration requirements under operating conditions.
Sampling plan, stats and acceptance criteria
- Sampling locations: center, four quadrants, and edges. Micro perforation processes (punching/laser) often show edge-to-center variation.
- Sample size: depends on plate size and production volume. For most jobs a minimum of 30–50 measured holes per plate gives a useful estimate of variation.
- Key statistics to report: mean diameter, standard deviation, min, max, and percent out-of-tolerance. Present a histogram and an SPC (X̄–R) chart for ongoing production runs.
- Acceptance example (illustrative): Specify a target diameter ± tolerance (e.g., nominal 0.30 mm ± 0.02 mm) and an AQL for percent of holes allowed out of tolerance — choose numbers appropriate for your application (this must be agreed with your customer).
Tip: Document the measurement method used (instrument model, magnification, calibration certificates), so measurement results are traceable and repeatable.
Common defects, likely causes and remedies
- Systematically undersized holes: worn punch/die or laser focus/beam energy drift → replace tooling or recalibrate laser.
- Burrs or ragged edges: incorrect clearance in punching or improper cutting parameters → adjust tooling gap or laser settings and add a de-burring pass.
- Non-round or elongated holes: misalignment in punching/feeding or sheet slippage → check feed mechanisms and clamping.
- Blocked holes: slug retention or debris after processing → add thorough cleaning, blow-off, or tumble finishing.
Final notes
Consistent pore-size uniformity is the product of good tooling, stable processes, and repeatable inspection. Start simple (visual + caliper) and escalate to automated vision or lab methods as the job’s tolerance and volume require. Recording measurement data and images protects both buyer and supplier and helps speed resolution if a problem shows up later.
Get a measurement protocol or quote
If you want a sample inspection protocol we can adapt to your product (or a quote for custom micro-perforated panels), contact us at info@perfsheet.com. Please include the nominal hole size, material, plate thickness, and estimated order quantity, and we’ll recommend a suitable inspection plan and acceptance criteria.


